구성하기
내가 원하는 것
app.get('/', (req, res) => {
  const html = createHTML(<App />);
  res.send(html);
});바로 이런 그림이다. 클라이언트와 동일한게 <App/>을 렌더링하고, 이걸 초기 HTML로 전송해주는 것이다.
그리고 클라이언트에서는 이렇게 App을 렌더링해줄 것이다.
import App from '../src/pages/App';
import { hydrate } from '@core/render';

hydrate(<App/>, document.getElementById('_miniNext'));
이러면 클라이언트와 서버에 대해서 동일한 App컴포넌트를 통해 따로 따로 코드 해당 환경에 맞는 코드를 작성할 필요없이 통합적으로 관리해줄 수 있다.
따라서 필요한 것들을 준비할 것인데, 이렇게 동작하려면 몇 가지 준비가 필요하다.
- JSX코드를 서버에서 트랜스파일링할 수 있어야한다.
- 클라이언트에서도 역시 JSX가 최종적으로는 일반적인 JS 파일형태로 변환되어 잘 실행될 수 있어야한다.
언어는 Typescript를 사용할 것이다.
서버 구동을 위해 Express, nodemon을 사용할 것이다.
JSX, typescript 트랜스파일링은 babel을 통해 구성할 것이다.
클라이언트의 JSX트랜스파일링은 번들링을 통해 해결할 것인데, index.html이 필요하지 않으므로 Rollup을 통해 구성해줄 것이다.
npm init -y
npm i typescript nodemon -D
npm i expressbabel과 rollup은 구성하면서 설치할 것이라 일단 이렇게 설치한다.
Babel
바벨을 통해 서버 코드를 트랜스파일링 해줄 것이다. (JSX사용을 위해)
npm i @babel/cli @babel/core @babel/plugin-transform-react-jsx @babel/preset-env @babel/preset-typescript
plugin-transform-react-jsx: JSX를 함수로 변환시켜주는 플러그인이다.
preset-typescript: babel이 typescript도 읽을 수 있게 해주는 플러그인이다. tsc말고 babel을 통해 바로 트랜스파일링 할 수 있게 구성할 것이다.
plugin-transform-react-jsx
원래는 react/jsx-runtime에서 jsx함수를 import하지만, babel.config.js를 통해 이 함수를 커스텀 할 수 있다.
나같은 경우 src/core에 핵심 함수들을 작성해두었다.
babel.config.js
따라서 babel.config.js를 아래와 같이 구성해주었다.
module.exports = {
  presets: ['@babel/preset-env', '@babel/preset-typescript'], //typescript 트랜스파일링
  plugins: [
    [
      '@babel/plugin-transform-react-jsx', //jsx 트랜스파일링
      { importSource: '@core', runtime: 'automatic' },
    ],
  ],
};<App/>과 같이 JSX를 호출하면 jsx()함수가 호출되게 되는데, 이 함수를 어디서 import할지를 결정해주는 것이다.
원래는 import { jsx, jsxs} from react/jsx-runtime 이나 importSource를 통해 react대신에 다른 문자를 지정해줄 수 있다.
위처럼 설정하면 import { jsx, jsxs} from @core/jsx-runtime 으로 소스가 변경된다.
또, runtime을 automatic으로 설정하면 jsx가 ,아니라면(classic) React.createElement가 호출된다.
나는 automatic으로 설정해주었다.
JSX
JSX는 babel을 통해 어떻게 변환될까?
<div className="flex">내용</div>위와 같은 JSX가 있다면, babel은 이렇게 변환한다.
jsx("div", {
    className:'flex',
    children: '내용',
});
이걸 나는 어쨌던 최종적으로 HTML과 VDOM요소로 변환해주어야하기때문에, 객체형태로 관리해야한다.
그리서 이런식으로 객체 타입을 짜주었다.
type DefaultProps = Record<string, string>;

type Props = DefaultProps & {
  children?: MiniReactNode[];
};

export interface MiniReactNode {
  tagName: string;
  props: Props;
}
그리고 jsx와 jsxs함수가 설계한 타입을 반환하도록 구현해주었다.
간단하게 작성하면, 입력으로 들어온 것을 객체에 담아만 주면 되므로 매우 간단하다.
export const jsx = (tagName: string, props: Props) => {
  return {
    tagName,
    props,
  } as MiniReactNode;
};

export const jsxs = jsx;
하지만 여러가지 경우의 수가 존재한다.
- tagName이 함수인 경우는 재귀적으로 호출해서 중첩된 객체를 내보내야한다.
- children이 중첩 배열일 수 있다.
- children이 빈 문자열을 포함할 수 있다.
- children이 없을수도 있다.
이러한 경우를 고려하여 최종적으로 이렇게 짜주었다.
src/core/jsx-runtime.ts
//src/core/jsx-runtime.ts

//어쨌던 children은 배열로 동작하게 만든다.
//이후에 VDOM diffing과 HTML render를 위해서는 배열로 구성하는게 용이하다.
const getChildren = (props: Props) => {
  if (Array.isArray(props.children)) return [...props.children];
  if (props.children === undefined) return [];
  return [props.children];
};

export const jsx = (tagName: Function|string, props: Props) => {
  props.children = getChildren(props);

  if (typeof tagName === 'function') return tagName(props); // tagName이 함수면 재귀적으로 호출한다.
  props.children = props.children.flat(); // 2차원 배열인 경우 flat시켜 1차원으로 만든다.
  props.children = props.children.filter((child: any) => {
    if (typeof child === 'number') return true; //빈문자열을 필터링한다. 다만, child가 0인 경우를 고려한다.
    return Boolean(child); ./
  });

  return {
    tagName,
    props,
  } as MiniReactNode;
};

export const jsxs = jsx;
서버쪽 JSX 테스트
src/pages/App.tsx
이렇게 한 뒤, JSX컴포넌트인 App.tsx를 pages에 만들어주자.
export default function App() {
  return <div style={{ width: '100%' }}>테스트</div>;
}
src/app.tsx
서버의 메인 코드인 app.tsx를 작성해주자.
//src/app.tsx

import express from 'express';
import App from './pages/App';
const app = express();
const port = 3000;

app.get('/', async (req, res) => {
  console.log(<App />);
});

app.listen(port, () => {
  return console.log(`Server Start at http://localhost:${port} ☺️`);
});
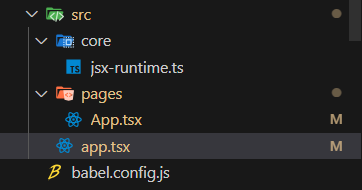
현재 폴더구조는 아래와 같다.

이제 babel을 통해 dist폴더에 트랜스파일링하고, 이를 node 명령어를 통해 실행시켜볼 것이다.
npx babel src --extensions .ts,.tsx --out-dir dist
경로 이슈
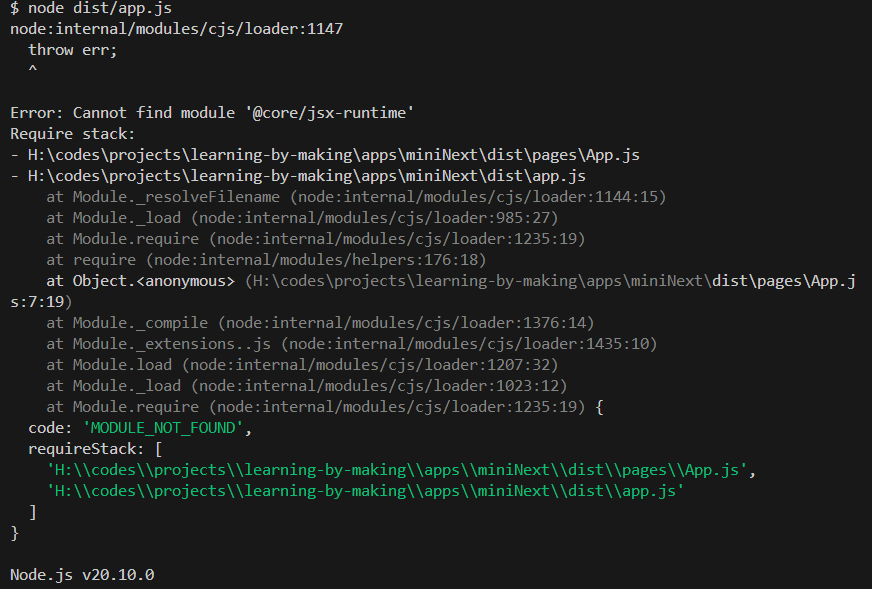
그리고 node dist/app.js로 실행시키면 오류가 발생한다.

이는@core/jsx-runtime 경로를 찾을 수 없기 때문이다.
Babel은 트랜스파일러라 module resolve를 해주지는 않는다. 해주려면 플러그인을 추가해주어야한다.
npm i babel-plugin-module-resolver -D이를 통해 트랜스파일링시 경로를 바꿔줄 수 있게된다.
babel.config.js
최종적으로 babel.config.js를 구성해주었다.
module.exports = {
  presets: ['@babel/preset-env', '@babel/preset-typescript'],
  plugins: [
    [
      '@babel/plugin-transform-react-jsx',
      { importSource: '@core', runtime: 'automatic' },
    ],
    [
      'module-resolver',
      {
        alias: {
          '@core': './dist/core', //jsx-runtime의 경로 찾기 모든 ts파일에 대해
          //  트랜스파일링 하기때문에 dist의 core경로에도 jsx-runtime이 생기게 된다.
          '@': './dist', //절대경로도 지정해주었다.
        },
      },
    ],
  ],
};
이러면 잘 실행되어 console이 잘 찍히는 것을 확인할 수 있다!

nodemon, package.json설정
nodemon을 이렇게 설정하였다.
{
  "watch": ["src"],
  "ext": "ts,tsx",
  "exec": "babel src --extensions .ts,.tsx --out-dir dist && node dist/app.js"
}이러면 src내부의 ts,tsx가 변경될때마다 트랜스파일링, 서버 재실행이 이뤄질 것이다.
이걸 package.json의 dev에 달아주었다.
{
	...
   "scripts": {
   ...
   "dev": "nodemon",
   },
}
클라이언트 JSX
그럼 이제 클라이언트에서도 동일한 JSX파일을 사용할 수 있는지 확인해야한다.
클라이언트에서 js파일을 확인할 수 있도록 public폴더를 만들어주고, static설정을 해주었다.
app.tsx
const app = express();
const port = 3000;
//==================여기를 추가했다!=================
app.use(express.static('dist/public'));
//=================================================

app.get('/', async (req, res) => {
  console.log(<App />);
});이러면 이제 dist/public은 정적파일 폴더로 작동한다. localhost:3000/index.js를 찾는경우 dist/public/index.js가 생긴다는 것이다.
그럼 public에 index.js파일을 만들고, 클라이언트에 보내줄 html을 만들고 script를 통해 index.js를 실행시키면 된다.
이때 번들링에 사용될 index.tsx에서 JSX를 사용하고, 이게 최종적으로 잘 작동하는지 확인해 보면 JSX컴포넌트는 서버와 클라이언트에서 모두 호출가능한 형태인 것이 된다.
public/index.tsx (src외부다)
import App from '../src/pages/App';

console.log(<App />);서버에서와 동일하게 App을 가져와 jsx함수로 호출해주었다.
Rollup
이걸 babel로만 트랜스파일링 하게되면 @core/jsx-runtime이 public에서도 접근가능해야한다.
이러한 설정을 해줄 수는 있겠지만, 이것보다는 번들러를 사용해서 하나의 번들을 구성해주는게 더 합리적이라 판단했다.
index.html대신 app.tsx에서 HTML string을 보내줄 것이므로, 다른 번들러가 아니라 rollup을 통해 번들을 구성해주었다.
npm i -D rollup @rollup/plugin-babel @rollup/plugin-node-resolve
@rollup/plugin-babel : babel을 사용해서 JSX를 트랜스파일링 해줄 것이다. 따라서 babel을 사용할 수 있도록 구성해야한다.
@rollup/plugin-node-resolve: 번들링시 module의 의존성문제를 해결해준다.

public/index.tsx를 entry로 하여 번들링하면 되므로 이렇게 구성해주었다.
rollup.config.js
const babel = require('@rollup/plugin-babel');
const resolve = require('@rollup/plugin-node-resolve');
const extensions = ['.js', '.jsx', '.ts', '.tsx'];
const path = require('path');

module.exports = [
  {
    input: './public/index.tsx',
    output: {
      file: './dist/public/index.js',
      format: 'es',
    },
    plugins: [
      babel({
        babelHelpers: 'bundled',
        presets: ['@babel/preset-env', '@babel/preset-typescript'],
        plugins: [ //babel.config.js와 동일하다.
          [
            '@babel/plugin-transform-react-jsx',
            { importSource: '@core', runtime: 'automatic' },
          ],
          [
            'module-resolver',
            {
              alias: {
                '@core': path.resolve(__dirname, 'src/core'),
              },
            },
          ],
        ],
        extensions,
      }),
      resolve({
        extensions,
      }),
    ],
  },
];
이제 rollup으로 클라이언트 파일을 번들링해보자.
rollup --config rollup.config.js
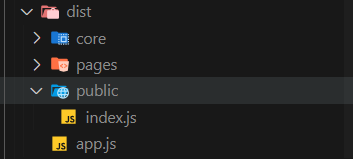
이렇게 dist에 public과 index.js가 생기는 것을 확인할 수 있다.
이제 이걸 app.tsx에서 클라이언트로 보내주기만 하면된다!
nodemon 수정
rollup커맨드를 같이 실행시켜준다.
{
  "watch": ["src"],
  "ext": "ts,tsx",
  "exec": "babel src --extensions .ts,.tsx --out-dir dist && rollup --config rollup.config.js && node dist/app.js"
}src/app.tsx
이제 '/'에 GET요청을 보내면 index.js를 실행시키는 html문자열을 생성해서 보내보자.
import express from 'express';
import App from './pages/App';

const app = express();
const port = 3000;
app.use(express.static('dist/public'));

app.get('/', async (req, res) => {
  console.log(<App />);
  const html = `<html>
  <head>
  <title>miniNext</title>
  </head>
  <body>
    <div>miniNext!</div>
  </body>
  <script src="index.js" ></script>
  </html>`;
  res.send(html);
});

app.listen(port, () => {
  return console.log(`Server Start at http://localhost:${port} ☺️`);
});
결과
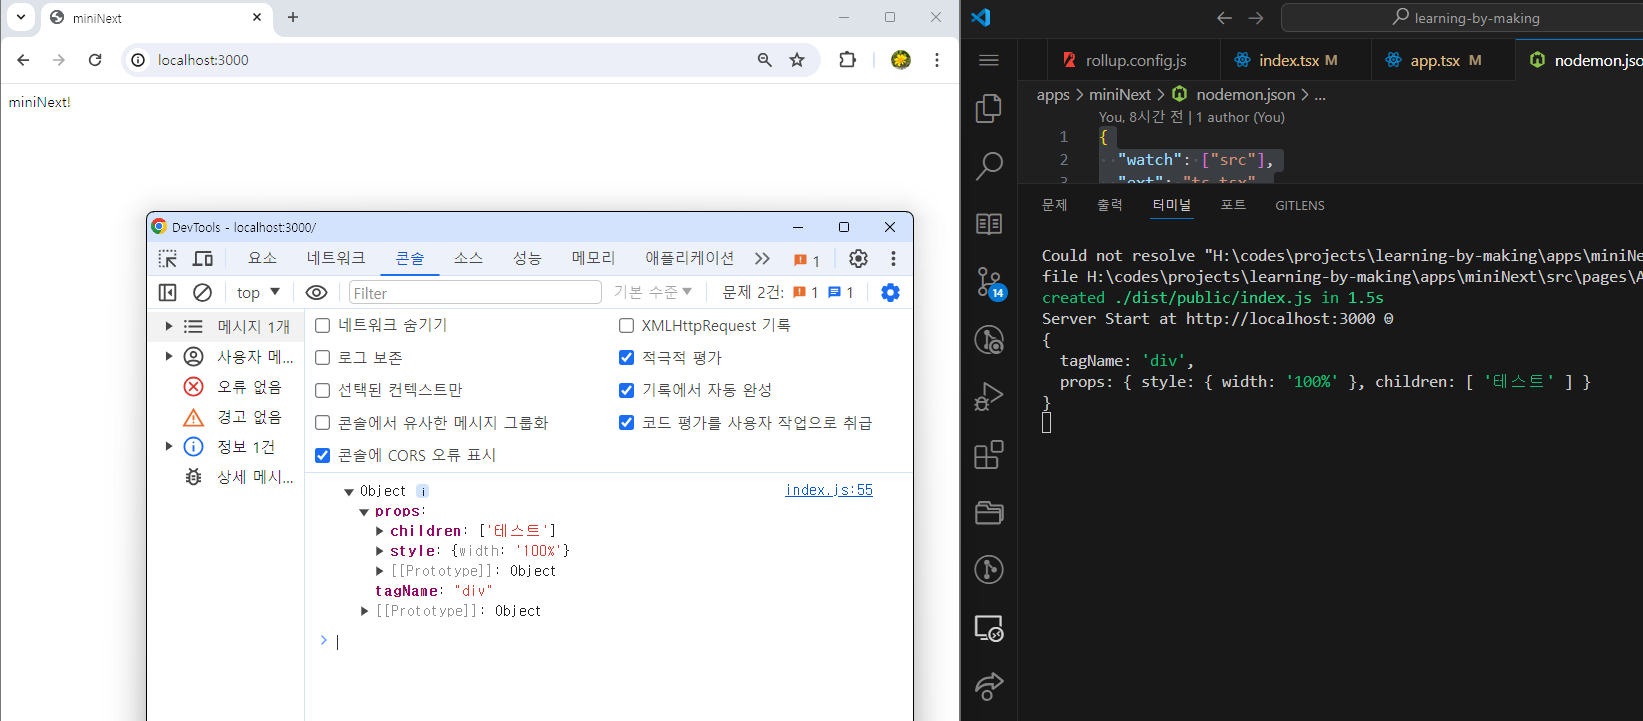
둘다 잘 작동하는 것을 확인할 수 있다.
감격스러운 순간이다.

전체 코드
https://github.com/d0422/learning-by-making/tree/main/apps/miniNext
learning-by-making/apps/miniNext at main · d0422/learning-by-making
✅ 직접 만들면서 학습하는 과정을 담은 레포지토리. ⚛️miniReact(useState구현), JS EventLoop Visualizer, miniNext(SSR,ISR) 직접구현하고, 이를 모노레포(pnpm+turborepo) 형태로 관리합니다. - d0422/learning-by-making
github.com
